Keeping your engine bay clean is crucial for maintaining the health and longevity of your vehicle. A clean engine bay not only looks fantastic but also makes it easier to spot potential issues, such as leaks or worn-out components. Learning how to super clean your engine bay during you car wash is easy. In this blog post, we’ll walk you through the process step-by-step, ensuring your engine bay looks pristine and well-maintained.
Table of contents
Why Super Clean Your Engine Bay?
Cleaning your engine bay goes beyond aesthetics. Here are a few reasons why you should make it part of your regular car wash routine:
- Improved Performance: A clean engine runs cooler and more efficiently. Dirt and grime can insulate parts, causing them to overheat.
- Easier Maintenance: Spot leaks, cracks, or wear more easily when the engine bay is clean.
- Resale Value: A well-maintained engine bay can increase your car’s resale value, as it indicates good overall care.
- Prevents Corrosion: Regular cleaning removes corrosive substances like road salt, prolonging the life of engine components.
Now, let’s dive into the step-by-step guide to add super cleaning your engine bay. It can become an addition to your car wash routine.
Preparation
Before you begin, gather all the necessary supplies. Having everything laid out will make the process quicker and more enjoyable. You’ll need:
- Microfiber towels
- Different brushes (paintbrushes, toothbrushes, metal wire brushes)
- Cleaning wipes
- Spray wax
- Trim restorer
- “Soapy wooder” (a mix of dish soap and water)
- Garbage bags
- Gloves and safety glasses
Step 1: Prepare the Engine Bay
- Safety First: Put on gloves and safety glasses to protect yourself from chemicals and dirt.
- Disconnect the Battery: Remove the battery if possible, or at least disconnect the positive and negative leads to prevent electrical issues. This step ensures there’s no electricity running through the engine, reducing the risk of short circuits.
- Cover Sensitive Components: Use a garbage bag to cover parts you don’t want to get wet, such as the alternator and distributor. Make sure spark plug wires are pressed down and secure to prevent water from entering the spark plug wells.
Step 2: Dry Clean the Engine Bay
Before getting the engine wet, it’s essential to perform a dry clean. This step helps remove loose dirt and debris, making the wet cleaning process more effective.
- Brush Off Dust: Use brushes to agitate and loosen dust and dirt on the engine’s surface. Long-handled brushes and toothbrushes work well for reaching tight spaces.
- Vacuum or Blow Away Dust: Use a vacuum to suck up loose dirt or an air compressor to blow it away. This prevents the dirt from being pushed into hard-to-reach areas when you start wet cleaning.
Step 3: Wet Clean the Engine Bay
This step involves using water and cleaning solutions to remove grime and grease. It can be daunting, but with the right technique, it’s entirely safe.
- Rinse the Hood: Start by rinsing the hood and surrounding areas. Use a gentle stream of water to avoid forcing water into sensitive areas.
- Apply Degreaser: Spray a degreaser or “soapy wooder” onto the surfaces. This mixture of dish soap and water is strong enough to cut through grease but gentle enough to avoid damaging components.
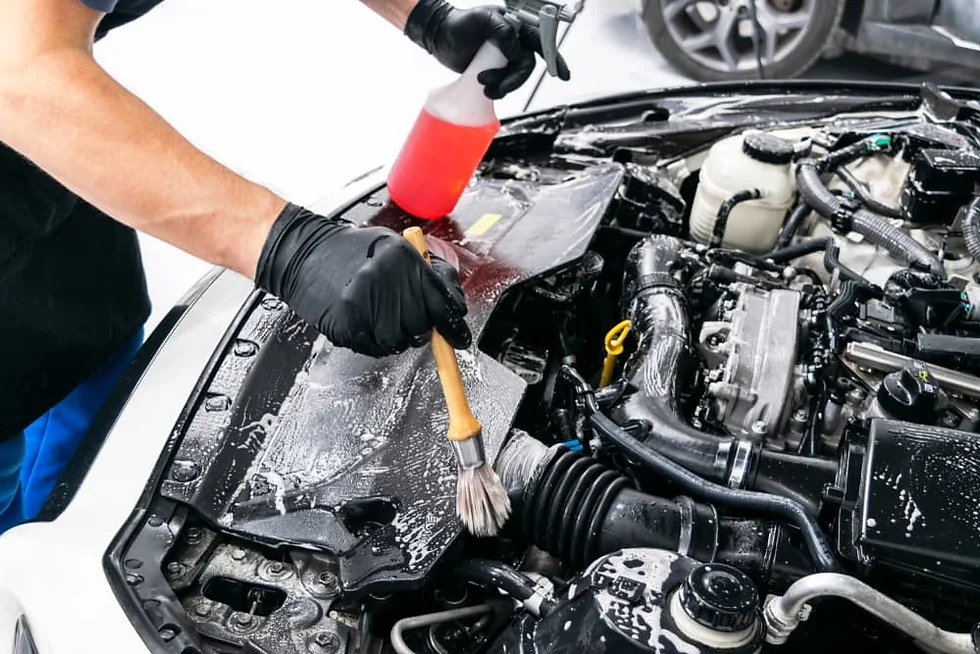
- Scrub the Surfaces: Use brushes to scrub all reachable surfaces. For tight spots, pipe cleaners or toothbrushes are effective.
- Rinse Again: Rinse off the degreaser and dirt with a gentle stream of water.
- Remove the Garbage Bag: Carefully remove the bag covering the engine to prevent water from spilling onto sensitive parts.
Step 4: Dry and Detail the Engine Bay
Detailing brings out the shine and protects the surfaces, making your engine bay look brand new.
- Dry the Engine: Use microfiber towels to dry the engine bay thoroughly. Pay attention to areas where water might collect, such as spark plug wells.
- Apply Spray Wax: Spray wax onto painted surfaces and buff it in with a microfiber towel. This step protects the paint and gives it a deep, glossy finish.
- Restore Trim: Use a water-based trim restorer on rubber and plastic parts. Avoid greasy products like motor oil or WD-40, as they attract dust and can damage materials.
- Buff the Surfaces: After allowing the trim restorer to soak in, buff the surfaces with a clean microfibre towel to remove excess product and ensure a non-greasy finish.
Step 5: Paint Markers for Details
Adding final touches can make your engine bay look professionally cleaned.
- Touch Up Rusty Areas: Use a metal wire brush to clean rust off bolts and other small parts. Then, cover these areas with a paint marker to give them a fresh, clean look.
- Final Inspection: Check for any areas you might have missed. Make sure everything is clean and dry before reconnecting the battery.
Regularly incorporating engine bay cleaning into your car wash routine can greatly benefit your vehicle. It keeps the engine running efficiently, makes maintenance easier, and enhances the overall appearance of your car. By following these steps, you can achieve a super clean engine bay that looks impressive and performs well. So, grab your cleaning supplies and give your engine bay the attention it deserves!
Have any personal tips to add? Write them in the comment section below! And don’t forget to subscribe to our blog and read our other articles for additional car care advice! Happy car washing!
FAQ
Q: How often should I clean my engine bay?
A: It’s recommended to clean your engine bay at least once a year to remove dirt, grease, and debris that can accumulate over time. Regular cleaning helps maintain the engine’s performance and prevents corrosion.
Q: Is it safe to wash the engine bay of my car?
A: Yes, it is safe to wash the engine bay of your car, but precautions should be taken. Avoid using high-pressure water directly on electrical components and sensors. Cover sensitive areas with plastic bags or waterproof covers before cleaning.
Q: What products should I use to clean my engine bay?
A: Use a degreaser or engine cleaner specifically designed for automotive use. Apply the cleaner to the engine bay, agitate with a detailing brush or soft cloth, and rinse thoroughly with low-pressure water. Avoid harsh chemicals that may damage rubber or plastic components.
Q: Can I clean my engine bay myself, or should I hire a professional?
A: You can clean your engine bay yourself with proper care and attention to detail. However, if you’re unsure about the process or have concerns about damaging sensitive components, it’s advisable to seek professional help from an experienced detailer.
Q: How should I protect my engine bay after cleaning?
A: After cleaning, consider applying a non-silicone-based dressing to rubber and plastic components to protect them from UV rays and moisture. Avoid getting dressing on belts or other moving parts. Regular maintenance and cleaning will help keep your engine bay looking clean and well-maintained.
Additional Resources
- How To Wash a Car Like a Professional
- How To Detail a Car: 10 Budget-Friendly TIPS for a perfect car wash
- How to Find a Car Valet Near Me
- Windshield Washing: How-To Guide
