If you’ve ever found yourself searching for a “car wash near me,” consider taking a more hands-on approach. Cleaning your car’s interior yourself not only saves time and money but also ensures a level of detail that you might not get from a professional service. Why not take matters into your own hands and give your car interior a professional-level cleaning?
In the realm of car ownership, there exists a particular satisfaction in maintaining the pristine condition of one’s vehicle. While the allure of professional car washes and detailing services is undeniable, there is a unique sense of accomplishment that comes from personally tending to the interior cleanliness of your cherished automobile.
In this guide, we’ll walk you through a step-by-step process to super clean your car’s interior, focusing on the dashboard, centre console, door panels, and glass. Let’s get started!
Preparation Steps
Before delving into the intricacies of interior cleaning, a ritual of preparation is essential. Rolling down the windows serves as a preemptive measure against the inadvertent spread of oily protectants, while disconnecting the battery ensures an uninterrupted cleaning session. With seats removed, access to the inner sanctum of the car becomes unencumbered, allowing for a thorough exploration of its hidden recesses.
- Roll Down Windows: To prevent any oily protectants from getting on the windows, roll them down. This step is crucial as oily residues are challenging to clean off.
- Disconnect the Battery: Since the doors will be open for an extended period, disconnect the battery to avoid draining it.
- Remove the Seats: Removing the seats provides better access to the interior, making it easier to clean thoroughly.
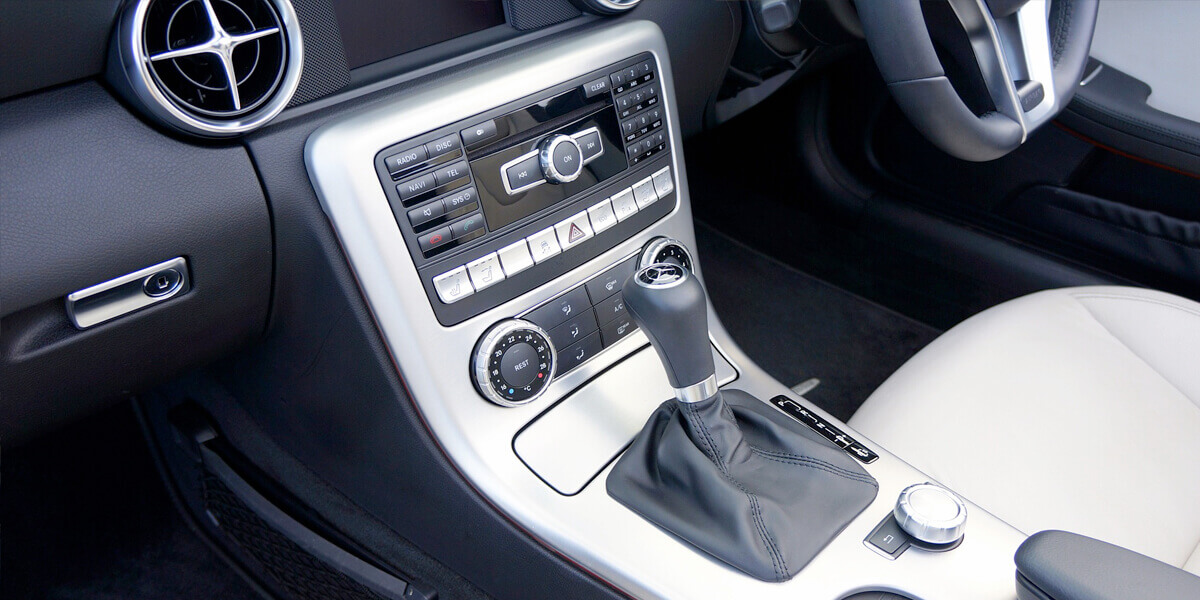
Cleaning the Centre Console
Begin by tackling the center console, which often harbors a multitude of debris, from melted candies to sticky change. Clear out the mess to pave the way for a thorough clean.
- Empty the Centre Console: Remove all items from the centre console to prepare for cleaning.
- Thoroughly Clean Out Debris: Use a vacuum or brush to remove any debris, melted candies, or sticky residue.
- Wipe Down with Mild Cleaner: Use a mild cleaner and a microfibre cloth to wipe down the interior of the console, ensuring to clean all surfaces thoroughly.
Cleaning the Dashboard
The dashboard, with its myriad contours and surfaces, presents both challenge and opportunity. A three-step process, akin to an artist’s brush strokes, is employed to restore its former glory. Dust removal, deep cleaning, and protection form the cornerstone of this transformative journey, ensuring that cracks are averted and fading becomes a distant memory.
A clean dashboard enhances the overall look of your car’s interior. Here’s a three-step process to make your dashboard look amazing:
- Dust Removal: Use a microfiber towel with long fibres to trap and remove dust. Lightly mist the towel with water and gently wipe the dashboard.
- Deep Cleaning: Use a soft brush and a mild cleaner designed for car interiors. Spray the cleaner onto the brush (not directly onto the dashboard) and scrub gently, ensuring you reach into crevices and textured surfaces.
- Protection: After cleaning, apply a protectant to prevent future cracks and fading. This step keeps your dashboard looking great for years to come.
Cleaning the Vents
Venturing into the labyrinthine passages of the vents requires finesse and precision. Armed with specialised tools, one navigates through the dusty corridors, banishing cobwebs and debris with each deft stroke. The result is a newfound clarity, where air flows freely, unimpeded by the shackles of neglect.
Dusty vents can detract from the cleanliness of your car. Here’s how to clean them effectively:
- Brush Vents: Use a vent cleaning brush with microfibre fingers to remove dust from the vents.
- Vacuum Attachment: Use a vacuum attachment with straws to reach deep into the vents and remove dust.
- Deep Cleaning: For deeper cleaning, use a vacuum attachment with multiple straws. This tool can reach deep into the vents, removing dust from hard-to-reach places.
- Wipe Down: Finish by wiping down the vents with a microfibre towel to remove any remaining dust.
Dusting the Rest of the Dashboard
Using a damp microfibre towel, gently dust the remaining parts of the dashboard. Remember to dust the infotainment screen and surrounding areas, as well as the buttons and dials near the steering wheel and gauge bezel.
Cleaning the Gauge Bezel
To avoid scratching the plastic lens on the gauge bezel, never use paper towels, napkins, or tissues. Instead, use a soft microfiber towel lightly misted with water. Wipe with very light pressure, swiping straight across. Avoid using compressed air, as it can blow dust behind the bezel, making it harder to clean.
Cleaning Buttons and Dials
The symphony of buttons and dials, nestled within the confines of the dashboard, demands attention to detail. With a delicate touch, each surface is caressed, every crevice explored. A toothbrush becomes an instrument of precision, eradicating grime from textured surfaces and restoring them to their former splendour.
Use a small brush to clean the buttons and dials. For textured surfaces like the gear selector knob, a toothbrush works wonders. This attention to detail makes a big difference in the overall cleanliness of your car’s interior.
- Dust Off: Use a brush to dust off buttons and dials, ensuring to get into crevices.
- Wipe Down: Wipe down buttons and dials with a microfibre towel lightly misted with water, ensuring a thorough clean.
Cleaning the Steering Wheel
The steering wheel, weathered by the passage of time, bears witness to countless journeys undertaken. Through the gentle ministrations of soapy water and a soft cloth, its surface is rejuvenated, its contours redefined. With each stroke, memories are polished anew, and the wheel emerges as a testament to resilience.
Your steering wheel can accumulate a lot of grime over time. To clean it:
- Soapy Water Wipe Down: Spray soapy water onto a microfibre towel and wipe down the steering wheel to remove dirt and grease.
- Detail with Toothbrush: Use a toothbrush with soapy water to clean dirt from stitching or hard-to-reach areas.
- Dry: Finish by wiping the steering wheel with a clean, dry microfibre towel to remove any remaining moisture.
Cleaning the Turn Signals
Use a soft microfiber towel with soapy water to clean the turn signals. Be gentle to avoid removing any printed or painted symbols.
- Gentle Wipe Off: Use a soft microfiber towel with soapy water to gently wipe off dirt from turn signals, avoiding excessive pressure.
- Preserve Symbols: Be cautious not to damage printed or painted symbols while cleaning.
Cleaning the Pedals
Beneath the feet lie the guardians of control – the pedals. Through careful cleansing and attention to detail, they are restored to their former glory. Dirt and grime, once entrenched, yield to the gentle persuasion of soapy water and a well-worn brush, leaving behind a surface as pristine as the day they were forged.
- Protect Surface: Place a towel under the pedals to catch any dirt or cleaner.
- Scrub with Brush: Use a brush with soapy water to scrub the pedals, paying attention to crevices and textured surfaces.
- Wipe Down: Finish by wiping down the pedals with a microfibre towel to remove any remaining dirt or water.
Final Steps
After cleaning, protect the dashboard with a high-quality protectant. This will keep it looking new and prevent future damage. Your car’s interior should now be sparkling clean, looking as good as new!
Conclusion
Amidst the hustle and bustle of daily life, the art of interior car cleaning offers a respite – a moment of reflection and rejuvenation. It is a pursuit driven not only by a desire for cleanliness but also by a profound appreciation for the vehicle that carries us through life’s myriad adventures. As we embark upon this journey, let us embrace the process with diligence and reverence, for within the confines of our cars lies a canvas awaiting our tender care and attention.
Instead of continually searching for a “car wash near me,” take pride in cleaning your car’s interior yourself. Not only will you save money and time, but you’ll also achieve a level of cleanliness that meets your high standards. With the steps outlined in this guide, you can ensure that your car’s interior remains in pristine condition.
Stay tuned for the next steps in our “The Art of a Super Clean Interior” series, where we will continue to guide you through the complete car wash process.
Additional Resources
- Tools and products: soon.
- Cleaning Carpets and Headliners.
- Cleaning a Car Dashboard, Centre Console, Door Panels & Glass.
- Detailing the Dashboard, Centre Console, Door Panels & Glass.
Don’t forget to subscribe to our blog and read our other articles for additional car care advice! Happy car washing!
