When it comes to maintaining a car, many people focus on the exterior, leaving the interior often neglected. However, the interior of your car is where you spend most of your time, and it deserves just as much attention, if not more. A spotless interior not only enhances the overall driving experience but also preserves the vehicle’s value. This chapter delves into the intricacies of super cleaning the interior of your car, with a particular focus on the carpets and headliner.
While many people look for a “car wash near me” to tackle this chore, you can achieve professional-level cleanliness by doing it yourself. By following these steps, you can save both time and money while ensuring a thorough clean that matches or even exceeds what you’d get at a professional car wash.
Setting the Stage for Cleaning
The first step in any thorough car washing process is preparation. Start by ensuring that your car is in a suitable environment for cleaning. Roll down the windows to prevent any cleaning products or interior protectants from smudging the glass. Open the trunk and disconnect the negative battery cable. This precaution not only prevents battery drain but also ensures safety when you’re dealing with seats, especially those equipped with airbags.
Before diving into cleaning, it’s crucial to prepare your car properly:
- Roll Down the Windows: This prevents any cleaners or protectants from getting on the glass, which can be tough to clean off.
- Open the Trunk: This allows for better access and ensures no area is overlooked.
- Disconnect the Negative Battery Cable: This is essential for two reasons:
- The doors will remain open for a few hours, which can drain the battery.
- You may need to remove the seats, and many modern seats have airbags. Disconnecting the battery ensures safety.
The Importance of Seat Removal
Many might shy away from removing the seats, thinking it’s a daunting task. However, taking out the seats allows for an unparalleled level of cleanliness. It opens up the space, giving you access to every nook and cranny. Unscrewing the seats and carefully disconnecting any wiring can make a world of difference in the cleaning process. Once the seats are out, be cautious not to scratch the interior as you manoeuvre them out of the vehicle.
Removing the seats provides better access to all areas of the car:
- Front Seats: Slide the seat forward, unscrew and remove the screws at the front and back. Carefully angle the seat back to disconnect any wires, then remove the seat without scratching the interior.
- Rear Seat: Press the levers below the seat to pop it out.
Removing the seats reveals the dirt and junk that accumulates underneath, which is often the source of unpleasant odours.
Clearing Out the Clutter
With the seats removed, you’re presented with a clear view of the interior. Begin by clearing out any loose garbage and debris from the floor and trunk. This step, though seemingly basic, is crucial. It prepares the area for a deeper clean and prevents any obstructions during the vacuuming process.
The Essentials of Carpet Cleaning
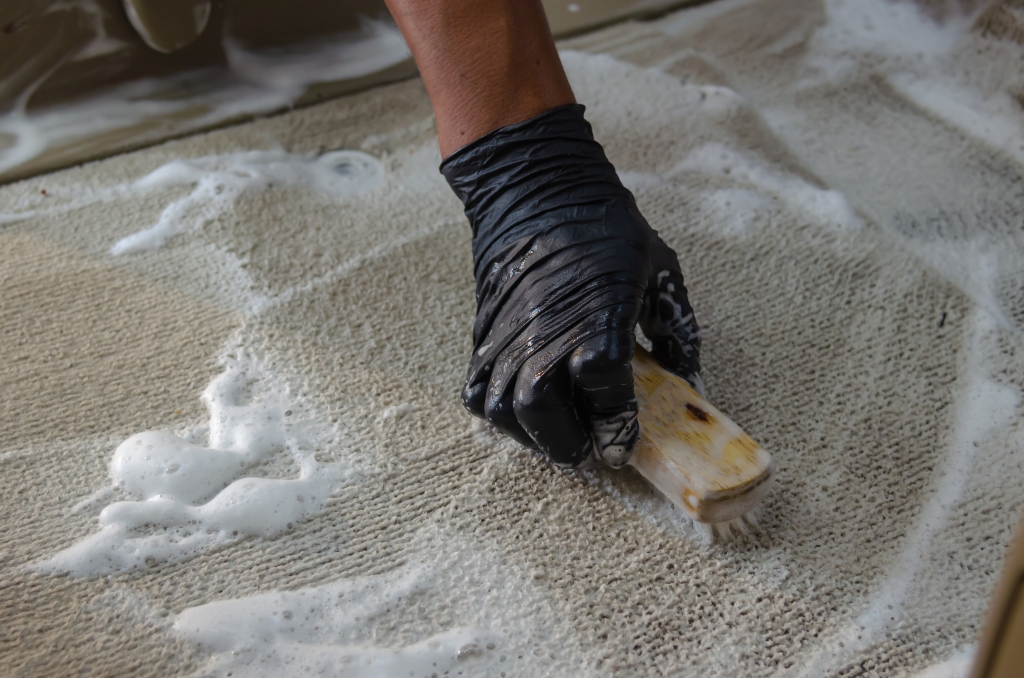
Carpets can harbor a surprising amount of dirt and grime, often unseen. Start with a thorough vacuuming to lift loose dirt. Employ a stiff bristle brush to agitate the carpet fibers, which helps in bringing embedded dirt to the surface. For those stubborn stains—think melted chocolate or chewing gum—a steam cleaner is invaluable. It softens and loosens the grime, making it easier to remove.
Shampooing the carpet is the next phase. Spraying the carpet cleaner and brushing it in various directions ensures that the cleaner penetrates deeply into the fibers. Using a microfiber towel to blot the area helps in absorbing the lifted dirt. For an even more profound clean, a water-injecting carpet vacuum can be used. This device injects water into the carpet to loosen dirt further and then extracts it, leaving your carpet looking rejuvenated.
To clean your car’s carpets, you’ll need:
- Microfiber towels
- A good vacuum
- A stiff bristle brush
- A carpet cleaner
Step-by-Step Carpet Cleaning
- Remove Floor Mats: Fold the edges inward to prevent dirt from falling back onto the carpets.
- Vacuum: Use a powerful vacuum to remove loose dirt. A shop vac with at least 5 horsepower is recommended.
- Brush and Vacuum Again: Use a stiff brush to agitate the carpet fibers and loosen embedded dirt, then vacuum again.
- Spot Clean: Treat stains with hot soapy water or a steam cleaner. For example, use hot water and a toothbrush for chocolate stains or a steam cleaner for gum.
- Shampoo: Spray carpet cleaner, brush it in, and use a microfiber towel to absorb the dirt and cleaner. For a deeper clean, use a water-injection carpet vacuum.
- Brush in One Direction: Once clean, brush the carpet fibers in one direction for a uniform look.
Revitalizing the Floor Mats
Floor mats endure the brunt of daily wear and tear. Start by shaking them out to remove loose dirt, then proceed to vacuum them thoroughly. For a deeper clean, a pressure washer can work wonders. Spray the mats with carpet cleaner, use a drill brush for scrubbing, and then rinse them thoroughly. Allow them to dry completely before placing them back in the car. Applying a carpet protector can help prevent future stains and make subsequent cleanings easier.
Floor mats can be cleaned similarly but outside the car:
- Brush and Bang Out Dirt: Use a stiff brush and bang the mats to remove trapped dirt.
- Vacuum: Remove any remaining dirt.
- Pressure Wash: Use a hose or pressure washer to clean the mats thoroughly.
- Carpet Cleaner: Apply and brush in carpet cleaner, then rinse.
- Extract Water: Use a vacuum extractor to remove most of the water and let the mats dry.
- Protect: Once dry, apply a carpet protector to prevent future stains.
Trunk Transformation
Often overlooked, the trunk is a crucial part of the interior. Begin by removing the trunk floor and the spare tire. Vacuum the area meticulously. The plastic trim in the trunk can accumulate dust and dirt; clean it with an interior cleaner and a brush. Applying a protectant to the plastic surfaces will keep them looking new. Pay attention to the painted areas and rain gutters around the trunk, using a waterless wash to clean these areas without introducing excess moisture into the trunk.
- Remove Trunk Floor and Spare Tire: Clean the spare tire area and side carpets.
- Brush and Vacuum: Use a brush to loosen dirt and vacuum thoroughly.
- Clean Plastic Trim: Use an interior cleaner and protectant on the plastic trim.
Gentle Care for the Headliner
The headliner requires a delicate touch due to its fabric and position. Start with a dry microfiber towel to remove surface dirt. For deeper cleaning, a soft bristle brush is recommended. Be gentle to avoid damaging the material. The headliner’s cleanliness significantly impacts the overall feel of the car’s interior.
Headliners are delicate and require gentle cleaning:
- Dry Cleaning: Use a clean, dry microfiber towel to lightly rub and remove dirt.
- Soft Brush: Use a clean soft brush to remove deeper dirt without liquid.
- Spot Clean with Minimal Liquid: If necessary, use minimal carpet cleaner and a soft brush, being careful not to over-wet the area.
Final Flourish
Once the cleaning is complete, allow the interior to dry thoroughly before reassembling. Placing the seats and floor mats back in should be done with care to maintain the cleanliness you’ve achieved. The result is a fresh, inviting interior that enhances every drive.
By following these steps, you can achieve a super-clean car interior that rivals professional services. Not only will you save time and money by not constantly searching for a “car wash near me,” but you’ll also gain the satisfaction of knowing your car is as clean as possible. Plus, by doing it yourself, you ensure every nook and cranny gets the attention it deserves. Enjoy your freshly cleaned car interior!
Cleaning your car’s interior, especially the carpets and headliner, is a rewarding endeavour. It’s more than just a routine task; it’s an investment in your vehicle’s longevity and your own comfort. By dedicating time and effort to this process, you can achieve a professional-level clean, elevating your driving experience. So, the next time you think about searching for a “car wash near me,” remember that you have the power to transform your car’s interior right at home.
Stay tuned for the next steps in our “The Art of a Super Clean Interior” series, where we will continue to guide you through the complete car wash process.
Additional Resources
- Tools and products: soon.
- Cleaning Carpets and Headliners.
- Cleaning a Car Dashboard, Centre Console, Door Panels & Glass.
- Detailing the Dashboard, Centre Console, Door Panels & Glass.
Don’t forget to subscribe to our blog and read our other articles for additional car care advice! Happy car washing!
