Hey there, car enthusiasts! If you’ve left your car sitting idle for a few months, only to discover it’s now a mouldy mess, don’t worry—you’re not alone. Mould can creep into your car’s interiors, making it not only unpleasant but also unhealthy. Today, I’ll walk you through the steps to effectively get rid of mould using a powerful mould cleaner, specifically white vinegar, so your car is as good as new.
| Type of Mould | Appearance | Health Risks | Common Locations |
|---|---|---|---|
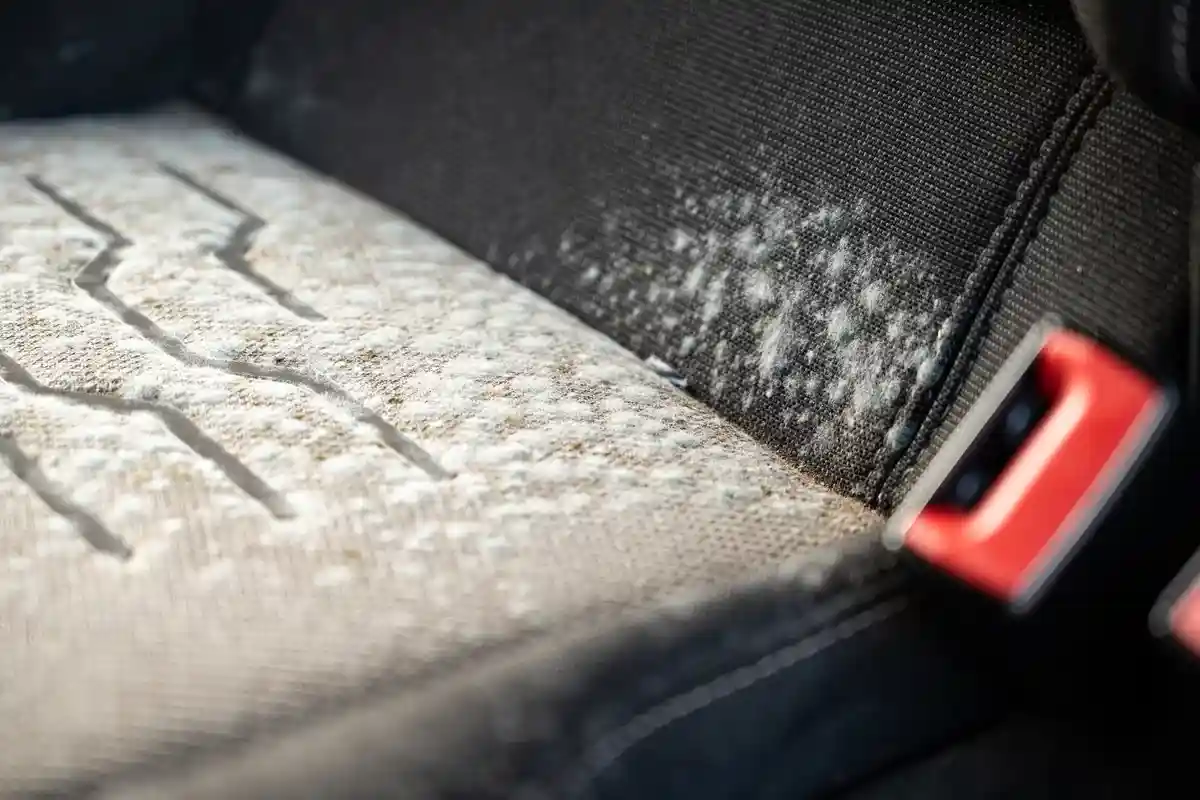
| Black Mould | Dark green or black spots | Respiratory issues, allergic reactions | Under seats, in carpets, on headrests |
| White Mould | White, powdery spots | Allergies, mild respiratory irritation | Door panels, on seats, in crevices |
| Green Mould | Green, fuzzy spots | Allergies, mild respiratory irritation | Dashboard, seat seams, air vents |
Q: What’s worse, black mould or white mould?
A: Black mould is generally worse than white mould due to its higher toxicity and potential to cause severe health issues. Both types should be removed to ensure a safe environment.
Q: What type of mould should I be worried about?
A: Black mould (Stachybotrys) is particularly concerning due to its potential health risks, including respiratory issues and allergic reactions. However, all mould types should be addressed promptly.
Table of contents
- Why Use a Mould Cleaner Like White Vinegar?
- What You’ll Need for a Mould Cleaner
- Step 1: Prepare and Protect Yourself
- Step 2: Initial Inspection
- Step 3: Apply the Mould Cleaner
- Step 4: Use a Steam Cleaner
- Step 5: Let It Sit
- Step 6: Wet and Dry Vacuum
- Step 7: Wipe Down Surfaces
- Step 8: Allow to Dry
- Step 9: Final Touches
- Step 10: Prevention Tips
- Mould Cleaner: Benefits of Using Professional Car Detailing Services
- The Best Mould Cleaner’s Final Thoughts
- FAQ
- Read Also
Why Use a Mould Cleaner Like White Vinegar?
White vinegar is a natural and effective mould cleaner. It’s affordable, readily available, and non-toxic, making it a safe choice for your car’s fabric and interior surfaces. Unlike many commercial mould cleaners that contain harsh chemicals, white vinegar is gentle yet powerful enough to kill a variety of mould species. Its acidic nature disrupts the growth of mould spores, making it an ideal cleaning agent for your car.
A good idea is to remove mould during the car wash. Here is the “How To Wash a Car: The Ultimate Guide Introduction” and “Car Wash at Home: 5 Easy Steps” guides for you!
What You’ll Need for a Mould Cleaner
Before you begin the mould removal process, gather all the necessary supplies. Having everything ready will make the job smoother and more efficient. Here’s what you’ll need:
- Distilled white vinegar: The star of the show, known for its mould-killing properties.
- Spray bottle: To apply the mould cleaner evenly across affected areas.
- Rubber gloves: Protect your hands from mould spores and cleaning agents.
- Respirator or mask: Essential to avoid inhaling harmful mould spores.
- Goggles: To protect your eyes from vinegar spray and mould particles.
- Steam cleaner: For deep cleaning and reaching into tight spaces.
- Wet and dry vacuum cleaner: To remove excess moisture and dead mould.
- Microfiber cloths: For wiping down surfaces without scratching them.
Step 1: Prepare and Protect Yourself
Before you start, it’s important to protect yourself. Mould spores can be harmful if inhaled or if they come into contact with your skin. Ensuring your safety is crucial before tackling the mould problem.
- Wear rubber gloves to protect your hands from direct contact with mould spores and cleaning agents. Gloves also help prevent skin irritation.
- Use a respirator to avoid inhaling mould spores. A dust mask isn’t sufficient as it doesn’t seal properly around your face, allowing spores to enter. A respirator provides a better seal and filtration.
- Goggles are a good idea to protect your eyes, especially when spraying the mould cleaner. The acidic nature of vinegar can cause discomfort if it gets into your eyes.
Step 2: Initial Inspection
Take a good look at the inside of your car. Mould often appears as green, black, or white spots. Conducting a thorough inspection helps identify all the areas that need cleaning.
- Seats and seatbelts: Check the seams and folds where mould can hide.
- Headrests: Remove them if possible to inspect and clean thoroughly.
- Dashboard: Mould can grow in the small crevices and air vents.
- Centre console: Don’t forget to check under and around cup holders and storage compartments.
- Door panels: Mould can develop in the fabric and around the edges.
- Carpet and floor mats: Lift the mats to check underneath.
- Boot area: Inspect under the spare tyre and in any storage areas.
Step 3: Apply the Mould Cleaner
Fill a spray bottle with undiluted distilled white vinegar, your natural mould cleaner. Vinegar is known for its ability to kill about 82% of mould species, as well as viruses and bacteria. Spraying vinegar is a crucial step in loosening and killing the mould.
- Spray all affected areas generously. Make sure to cover every spot where mould is visible. Don’t forget to spray hidden areas such as under seats and in the boot.
- Avoid scrubbing dry mould initially as this can release spores into the air. The vinegar helps to wet the spores, reducing the risk of them becoming airborne.
Step 4: Use a Steam Cleaner
If you have access to a steam cleaner, now’s the time to use it. The combination of vinegar and steam will help to kill mould more effectively. Steam cleaners penetrate deeply into fabrics and hard-to-reach areas.
- Fill the steam cleaner with a mixture of water and a small amount of vinegar. This enhances the mould cleaner’s power.
- Steam all the nooks and crannies where mould might be hiding, ensuring thorough coverage. Focus on areas like seat seams, dashboard vents, and door panel edges.
Step 5: Let It Sit
Allow the vinegar to sit and work its magic for at least 30 minutes. This gives it time to break down the mould. Patience is key at this stage to ensure the mould cleaner has enough time to be effective.
Step 6: Wet and Dry Vacuum
After letting the vinegar sit, use a wet and dry vacuum to clean the surfaces. This step helps to remove the dead mould and any remaining spores. The vacuum also helps to extract moisture, preventing future mould growth.
- Fill the vacuum with hot water and add a bit of carpet cleaning solution if you have it. The heat and cleaning solution help to break down any stubborn mould residues.
- Vacuum all the sprayed areas thoroughly, ensuring you get into all the crevices. Pay extra attention to areas with heavy mould infestation.
Step 7: Wipe Down Surfaces
Using microfiber cloths, wipe down all the surfaces you treated. This helps remove any remaining mould residue and excess moisture. Microfiber cloths are ideal because they trap dust and mould particles effectively.
- Focus on high-contact areas like the dashboard, steering wheel, and seatbelt buckles. These areas are frequently touched and need to be thoroughly cleaned.
- Check and clean the headrests separately if they can be removed. Headrests often harbour mould in their seams and stitching.
Step 8: Allow to Dry
Let your car dry out completely. This can be done by leaving the doors open on a dry, sunny day, or using fans to speed up the process. Proper drying is essential to prevent the return of mould.
Step 9: Final Touches
Once everything is dry, consider using a fabric cleaner for the upholstery. This will help to brighten up the seats and remove any lingering odours. A clean, fresh-smelling car interior is the perfect finishing touch.
- Use a standard upholstery cleaner following the product instructions. These cleaners are designed to lift dirt and stains from fabric surfaces.
- Vacuum again to remove any cleaner residue and ensure the interior is spotless. A final vacuuming ensures no cleaning product is left behind.
Step 10: Prevention Tips
Now that your car is clean, here are a few tips to prevent mould from returning. Maintaining a mould-free environment is easier with these simple preventive measures.
- Keep your car dry: Wipe up spills immediately and use moisture-absorbing products. Products like silica gel packs can help keep the interior dry.
- Regular cleaning: Clean your car’s interior regularly to prevent build-up of mould and dirt. Routine cleaning helps catch mould before it becomes a problem.
- Proper ventilation: Ensure your car is well-ventilated, especially after it’s been exposed to moisture. Open the windows slightly when parked to allow air circulation.
Mould Cleaner: Benefits of Using Professional Car Detailing Services
While DIY methods using mould cleaners like white vinegar can be effective, sometimes the mould infestation in your car might require professional attention. Here are the benefits of opting for professional car detailing services to address mould issues:
| Benefit | Description |
|---|---|
| Expertise and Experience | Professional detailers know the best mould cleaners and techniques for different materials and levels of mould growth. |
| Advanced Tools and Equipment | Utilizes high-powered steam cleaners, industrial vacuums, and specialized mould cleaners for thorough cleaning. |
| Thorough Cleaning | Comprehensive service that covers every nook and cranny, ensuring all mould spores are effectively removed. |
| Health and Safety | Ensures safe handling of mould with protective gear and proper techniques, reducing the risk of exposure to toxic spores. |
| Time-Saving | Efficiently handles the entire cleaning process, saving you valuable time. |
| Preventative Measures | Applies treatments to help prevent future mould growth and recommends products to keep your car’s interior dry. |
| Enhanced Vehicle Value | Maintains and enhances your car’s value by keeping the interior mould-free, clean, and well-maintained. |
Incorporating professional car detailing services can be a wise investment when dealing with mould in your car. While DIY methods with mould cleaners like white vinegar are effective for minor issues, severe or persistent mould problems benefit from the thorough and expert care that professional detailers provide.
The Best Mould Cleaner’s Final Thoughts
Getting rid of mould in your car doesn’t have to be a daunting task. By following these steps, you’ll not only eliminate mould but also ensure your car remains a pleasant and safe environment. With the right tools and a bit of elbow grease, you can restore your car’s interior to its former glory. Remember, white vinegar is your best friend as a natural mould cleaner, offering a cost-effective solution.
| Tip | Details |
|---|---|
| Keep Your Car Dry | Wipe up spills immediately and use moisture-absorbing products like silica gel packs. |
| Regular Cleaning | Clean your car’s interior regularly to prevent mould and dirt build-up. |
| Proper Ventilation | Ensure your car is well-ventilated, especially after exposure to moisture. Open windows slightly when parked. |
If you found this guide helpful, don’t forget to share it with other car owners. And if you have any tips or experiences of your own, leave a comment below! Until next time, happy cleaning!
FAQ
Q: Can you get rid of mould in a car?
A: Yes, you can get rid of mould in a car by using a mould cleaner like white vinegar. Clean thoroughly, use a steam cleaner, and ensure the car is completely dry to prevent mould from returning.
Q: Is it safe to drive a car with mould?
A: No, it is not safe to drive a car with mould. Mould can cause respiratory issues, allergic reactions, and other health problems, especially in a confined space like a car interior.
Q: Why is my car full of mould?
A: Your car may be full of mould due to prolonged exposure to moisture and poor ventilation. This can happen from spills, leaks, or high humidity levels combined with the car being unused for a long period.
Q: Is mould in a car toxic?
A: Yes, mould in a car can be toxic. It can cause respiratory problems, allergic reactions, and other health issues, especially with prolonged exposure in a confined space.
Q: What is auto mould?
A: Auto mould is a fungus that develops in vehicles due to damp conditions and poor ventilation. It can appear on seats, carpets, and other interior surfaces, posing health risks.
Q: What causes mould in cars in winter?
A: Mould in cars during winter is caused by moisture accumulation from snow, rain, and condensation. Poor ventilation and damp conditions create an ideal environment for mould growth.
Q: What are the different types of mould in a car?
A: Different types of mould in a car include black mould, white mould, and green mould. Each type can pose health risks and should be removed promptly to ensure a safe interior environment.
Q: Will car detailing remove mould?
A: Yes, professional car detailing can remove mould. Detailing services include thorough cleaning and disinfection of the car’s interior, targeting mould and preventing its return.
Read Also
- Car Wash With Brushes: Will It Scratch Paint?
- Car Wash Self Service Equipment: A Complete Guide to Equipment
- Pre Wash Car Techniques You Haven’t Tried Yet
