Are you tired of stepping into your car and being greeted by a faded, grimy interior? Cleaning your car’s dashboard and interior yourself not only saves time and money but also ensures a level of detail that a professional service may not provide.
Let’s bring back that fresh, showroom look and feel with a thorough cleaning and protective treatment. Why not take matters into your own hands and have your car’s interior professionally cleaned? In this guide, we’ll walk you through the process of detailing your car’s interior, focusing on the dashboard, centre console, door panels, and glass.
Table of contents
Dashboard Detailing:
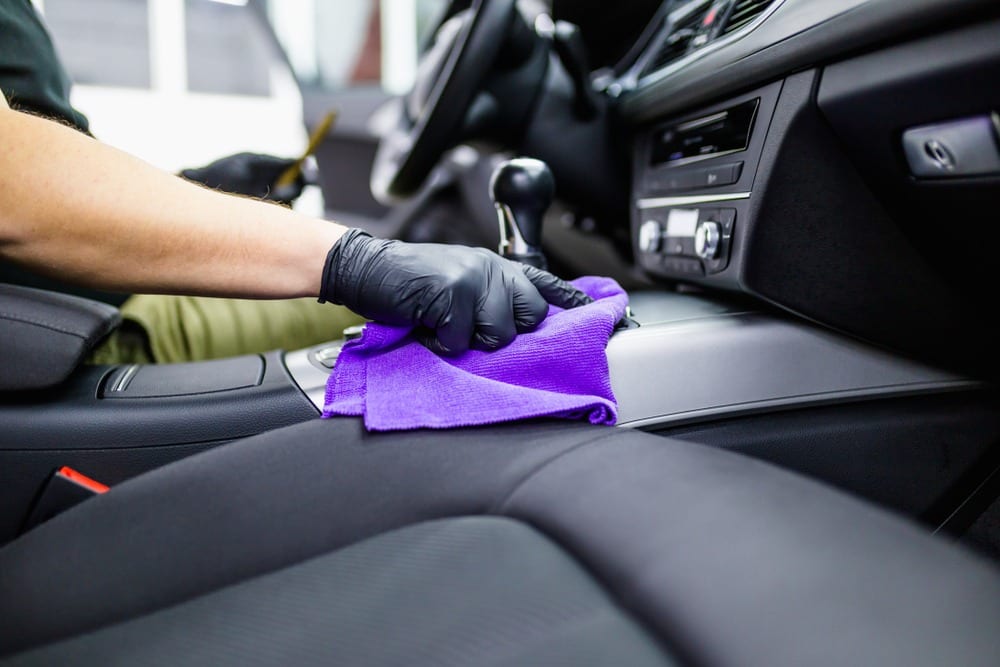
Start by giving your dashboard the attention it deserves. Use a low gloss protectant and a soft brush to work the protectant into every nook and cranny of the dash. Be generous with the protectant to ensure even coverage. Avoid getting any protectant on the windshield to prevent unsightly stains. Once applied, let it sit for a moment before buffing it off with a clean microfiber towel. You’ll be amazed at the difference – your dash will look brand new.
The dashboard is often prone to dust, grime, and fading, but with the right techniques, you can restore its shine and protect it from future damage.
Step-by-Step to Cleaning a Car Dashboard
Preparation:
- Materials Needed:
- Low gloss protectant
- Soft brush
- Clean microfibre towel
Application:
- Spray Protectant: Spray a low gloss protectant onto a soft brush.
- Work It In: Gently work the protectant into every nook and cranny of the dashboard. Be generous to ensure even coverage.
- Avoid Glass Contact: Take care not to get any protectant on the windshield to prevent unsightly stains.
- Buff Off Excess: Let the protectant sit for a few minutes, then buff off the excess with a clean microfibre towel. You’ll be amazed at the difference – your dash will look brand new.
Maintaining Your Dashboard
- Regular Dusting: Use a soft, dry microfibre cloth to dust your dashboard regularly.
- Avoid Harsh Cleaners: Steer clear of harsh chemical cleaners that can damage the material.
- Sun Protection: Use a sunshade when parked to protect the dashboard from UV damage.
Infotainment System TLC:
Next after cleaning a car dashboard, extend your routine to the infotainment system, taking care not to get any protectant on the screen. Use the same method as the dashboard, ensuring thorough coverage while avoiding any sensitive areas. Attention to detail is key – even the smallest speck of dirt can make a difference in the overall appearance.
Cleaning the Infotainment System
Gentle Cleaning:
- Avoid Direct Contact: Apply a gentle screen cleaner to a microfiber cloth, not directly on the screen.
- Remove Fingerprints: Wipe the screen gently to remove fingerprints and smudges.
- Clean Buttons and Knobs: Use a soft brush or cloth to clean around buttons and knobs, preventing dirt buildup.
- Protect Against Stains: Apply a protective spray to the surrounding surfaces to repel dust and prevent staining. Ensure the product is safe for use on electronics.
Button and Dial Refinement:
For buttons and dials, opt for a high gloss protectant to add a shiny finish. Don’t worry about glare; lower dash components are less prone to sunlight reflection. The protectant will bring back the rich colour to faded plastics, leaving them looking fantastic.
Buttons and dials on the dashboard can accumulate dirt and grime over time, affecting their appearance and functionality. Follow the following steps to refine them.
Steps for Cleaning Buttons and Dials
Cleaning Process:
- Gentle Cleaning: Use a soft brush or cloth to remove dust and debris from buttons and dials.
- Spot Cleaning: For stubborn stains, dampen a cloth with a mild cleaning solution and gently wipe the affected areas.
- Dry Thoroughly: Ensure buttons and dials are completely dry to prevent moisture damage.
Tips for Maintaining Buttons and Dials
- Avoid Excessive Force: Be gentle to prevent damage.
- Regular Cleaning: Clean buttons and dials regularly to prevent buildup.
Steering Wheel Precautions:
While steering wheels shouldn’t be treated with protectant (to avoid a slippery grip), the area behind the wheel can benefit from protection. Lower the steering wheel for better access, ensuring all plastic surfaces are covered. Don’t forget to clean the often-overlooked gap between the wheel and the base for a truly polished look.
The steering wheel is one of the most frequently touched surfaces in the car, making it susceptible to dirt, oils, and germs. Here’s how to take precautions while cleaning it as part of cleaning a car dashboard.
Cleaning the Steering Wheel
Precautions:
- Avoid Slippery Surfaces: Do not apply protectants or shiny finishes to the steering wheel as they can create a slippery surface.
- Focus on Surrounding Areas: Clean and protect the plastic components behind the steering wheel.
- Dusting Between Gaps: Use a microfibre towel or brush to remove dust from the gap between the steering wheel and the base.
Maintaining the Steering Wheel
- Regular Cleaning: Wipe down the steering wheel regularly with a damp cloth.
- Hand Hygiene: Keep your hands clean to minimise dirt transfer.
Gloss Plastic Care:
If your car’s interior features gloss plastic surfaces, treat them similarly to painted exteriors. A waterless wash and wax product works wonders here, providing both cleaning and protection in one step. Apply with a clean microfibre towel, buff gently, and admire the gleaming results.
Steps for Gloss Plastic Care
Cleaning and Protection:
- Choose the Right Products: Use a waterless wash and wax designed for gloss plastics.
- Apply Sparingly: Apply a small amount of the product to a clean microfibre cloth and gently buff the surfaces.
- Avoid Over-application: Be cautious not to apply too much product, as excess residue can attract dust.
Tips for Maintaining Gloss Plastic
- Regular Cleaning: Keep gloss plastic surfaces clean to maintain their shine.
- Protective Products: Use products designed specifically for gloss plastic.
Door Panel Deep Clean:
Door panels often bear the brunt of dirt and grime. Remove rubber inserts for thorough cleaning, and use a cleaner and brush to tackle textured surfaces and switches. Finish with a protectant for a fresh, rejuvenated appearance.
Deep Cleaning Process:
Door panels endure daily wear and tear, accumulating dirt and grime. Follow these steps to clean and protect them effectively.
- Vacuum Fabric: Begin by vacuuming the fabric on door panels.
- Clean Textured Surfaces: Use a cleaner and brush to clean textured surfaces and door pockets.
- Apply Protectant: Saturate the door panels with a suitable protectant, ensuring even coverage.
Tips for Maintaining Door Panels
- Regular Cleaning: Clean door panels regularly to prevent buildup.
- Protective Measures: Use protectants to keep surfaces looking fresh.
Centre Console Restoration:
The centre console is a hotspot for mess. Taking care of it should be a part of cleaning a car dashboard. Remove rubber inserts, steam clean for sanitisation, and apply protectant for easy cleanup of future spills. Don’t forget to replace any damaged components for a complete refresh.
Cleaning the Centre Console
The centre console often harbours spills and debris, making regular cleaning essential. Here’s how to tackle it:
- Remove Rubber Inserts: Start by removing rubber inserts for easy cleaning.
- Steam Clean: Use a steam cleaner to melt away dirt and sanitise rubber inserts.
- Apply Protectant: After cleaning, apply a protectant to prevent future stains and spills.
Tips for Maintaining the Centre Console
- Regular Cleaning: Clean the centre console regularly to prevent buildup.
- Protective Products: Use protectants to keep surfaces looking new.
Glass Cleaning Techniques:
Achieve streak-free, crystal-clear windows with the right tools and techniques. Use a glass cleaner safe for tinted windows, paired with fresh, clean towels for optimal results. Don’t overlook tough-to-reach spots, such as between the dash and windshield, where specialized tools can make a difference. Exercise caution when cleaning rear windows with heating elements to avoid damage.
Steps for Cleaning Car Windows
Crystal clear glass not only improves visibility but also enhances the overall appearance of your car. Follow these steps for streak-free glass:
- Choose the Right Cleaner: Use a glass cleaner safe for tinted windows.
- Wipe in Sections: Clean the glass in horizontal and vertical motions.
- Attention to Detail: Use a brush or specialized tool to reach tight spots.
Tips for Maintaining Clean Windows
- Regular Cleaning: Clean windows regularly to maintain visibility.
- Use Clean Towels: Always use fresh, clean towels for the best results.
Conclusion
With attention to detail and the right products and techniques, you can transform your car’s interior from dull and dirty to pristine and protected. Whether it’s dashboard detailing, door panel deep cleaning, or glass care, each step contributes to a rejuvenated and refreshed interior that you’ll love stepping into. So why wait? Treat your car to a spa day and experience the joy of a super clean interior.
Today we’ve covered cleaning a car dashboard. Stay tuned for the next steps in our “The Art of a Super Clean Interior” series, where we will continue to guide you through the complete car wash process. Don’t forget to subscribe to our blog and read our other articles for additional car care advice! Happy car washing!
Additional Resources
- Inside the Mobile Car Washing
- Cleaning Carpets and Headliners
- Streak Free Windows After Car Wash
- Detailing the Dashboard, Centre Console, Door Panels & Glass
- How To Stop Car Windows From Fogging up: A Secret Method
